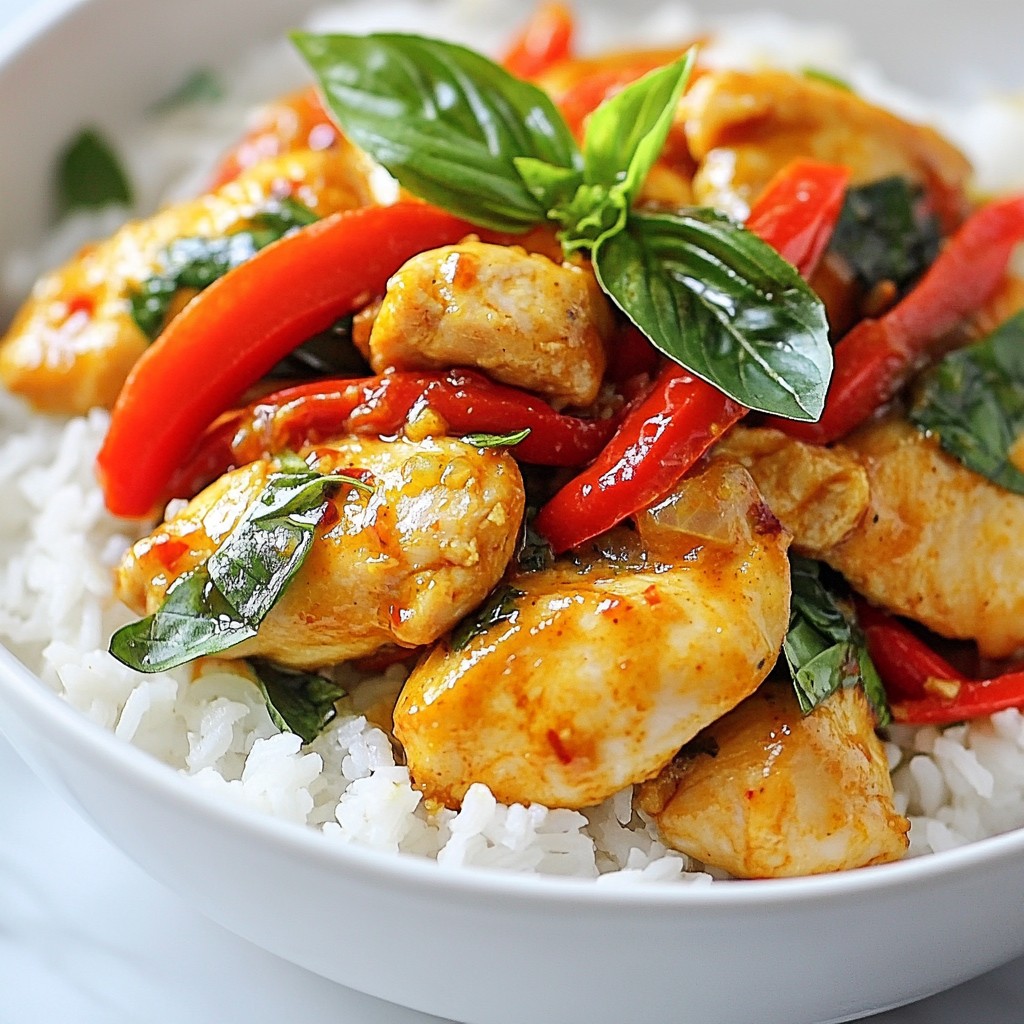
Craving sweet and sour chicken but want to skip takeout? You’re in the right spot! This recipe brings the flavors of your favorite dish right to your kitchen. With simple steps and ingredients, you’ll whip up a meal that outshines any restaurant. Let’s get started on making your own delicious, crispy, and tangy sweet and sour chicken that’s sure to impress. Are you ready to cook up something amazing?
Ingredients
Main Ingredients for Sweet and Sour Chicken
– 1 lb boneless, skinless chicken breast, cut into bite-sized pieces
– 1/2 cup cornstarch
– 1/2 cup all-purpose flour
– 1 teaspoon salt
– 1/2 teaspoon black pepper
– 1/2 teaspoon garlic powder
– 1/2 teaspoon onion powder
– 1/4 cup vegetable oil, for frying
– 1 red bell pepper, diced
– 1 green bell pepper, diced
– 1 cup pineapple chunks (fresh or canned)
– 1/2 onion, diced
– 3 cloves garlic, minced
– 1/4 cup ketchup
– 1/4 cup apple cider vinegar
– 1/4 cup brown sugar
– 1 tablespoon soy sauce
– 1 teaspoon fresh ginger, grated
– 1/4 teaspoon red pepper flakes (optional)
Optional Garnishes
– Chopped green onions
– Sesame seeds
Cooking Essentials for Preparation
To make this dish, you will need a large mixing bowl, a whisk, and a spacious skillet. The mixing bowl helps combine the dry ingredients well. The skillet is key for frying and sautéing. Use a paper towel to drain excess oil after frying. This keeps the chicken crispy and light.
Step-by-Step Instructions
Preparing the Chicken
First, make the coating. In a large bowl, mix cornstarch, flour, salt, black pepper, garlic powder, and onion powder. Whisk until smooth. Take your bite-sized chicken pieces and coat them in this dry mix. Make sure each piece is covered well. Shake off any extra flour to keep them from clumping.
Frying Process
Heat vegetable oil in a large skillet over medium-high heat. When the oil shimmers, add the coated chicken. Do this in small batches. Fry for 5 to 7 minutes until the chicken is golden brown. Once done, place the chicken on a plate lined with paper towels. This helps soak up any extra oil.
Making the Sweet and Sour Sauce
In a separate bowl, whisk together ketchup, apple cider vinegar, brown sugar, soy sauce, grated ginger, and red pepper flakes if you like some heat. This mix creates a bright and tasty sweet and sour sauce.
Combining Ingredients
In the same skillet, add diced onion, minced garlic, and both bell peppers. Sauté these for about 3 to 4 minutes. Stir them until they soften and smell great. Then, pour the sauce over these veggies. Add pineapple chunks and stir gently. Let it simmer for about 2 to 3 minutes. This lets the sauce thicken. Finally, add the fried chicken back to the skillet. Toss it all together until the chicken is well coated. Cook for another 2 minutes to heat through. Serve it up and enjoy!
Tips & Tricks
Achieving the Perfect Crispy Coating
To get that ideal crispy coating on your chicken, follow these steps:
– Use a Dry Coating: Mix cornstarch and flour for a light texture.
– Even Coating: Toss chicken pieces well in the dry mix. Ensure each piece is covered.
– Shake Off Excess: Remove extra flour to avoid clumping while frying.
– Hot Oil: Heat the oil well before adding chicken. This helps seal the coating.
– Don’t Crowd the Pan: Fry in small batches. This keeps the temperature steady for crispiness.
Best Practices for Sautéing Vegetables
Sautéing vegetables well enhances their flavor. Here’s how to do it:
– Prep Ahead: Chop all vegetables before you start cooking. This saves time.
– High Heat: Use medium-high heat to cook quickly and keep veggies crunchy.
– Add Garlic Last: Add minced garlic in the last minute to avoid burning.
– Stir Frequently: Keep the vegetables moving for even cooking and great texture.
– Bright Colors: Choose fresh, vibrant bell peppers and onions; they add color and taste.
Adjusting Sweetness and Acidity Levels
Balancing sweetness and acidity makes the dish shine. Here’s what to keep in mind:
– Taste the Sauce: Mix ketchup, vinegar, and sugar, then taste it. Adjust as needed.
– Add More Sugar: If it’s too sour, add a bit more brown sugar to sweeten.
– Increase Acidity: For a tangier flavor, add more apple cider vinegar slowly.
– Fresh Ingredients: Use fresh pineapple for natural sweetness and a fruity note.
– Personalize: Feel free to tweak the sauce to match your taste.

Variations
Alternative Proteins (Tofu, Shrimp)
You can easily swap chicken for other proteins. Tofu is a great choice. It absorbs flavors well. Just press it to remove water, then cut it into cubes. Coat it the same way you would chicken. You can also use shrimp. Shrimp cooks quickly and adds a nice touch. Use peeled and deveined shrimp for the best results.
Different Vegetable Combinations
Feel free to mix up the veggies in this dish. Broccoli, snap peas, and carrots work great. These add color and crunch. You can also use baby corn or snow peas. Just remember to chop them into bite-sized pieces. This way, they cook evenly and blend well with the sauce.
Low-Sugar or Healthier Sauce Options
Want to cut down on sugar? You can use a sugar substitute. Try using honey or maple syrup instead of brown sugar. These options add sweetness with less impact. You can also reduce the amount of ketchup. Adding more vinegar can enhance the flavor without extra sugar. Adjust the sauce to fit your taste and health goals.
Storage Info
Best Practices for Refrigeration
After you make sweet and sour chicken, let it cool down. Place it in an airtight container. Store it in the fridge for up to three days. This keeps the chicken fresh and tasty.
Freezing Tips for Leftovers
If you have extra sweet and sour chicken, freeze it for later. Use a freezer-safe bag or container. Make sure to remove air to avoid freezer burn. It can last for up to three months in the freezer. When you’re ready to eat, just thaw it in the fridge overnight.
Reheating Instructions
To reheat, you can use the microwave or stovetop. If using the microwave, heat on medium power. Stir every minute for even heating. If using the stovetop, place it in a pan over medium heat. Add a splash of water to keep it moist. Stir until it’s hot. Enjoy your meal just like the first time!
FAQs
How do I make sweet and sour sauce from scratch?
To make sweet and sour sauce, you need simple ingredients. Here’s how:
– Mix together:
– 1/4 cup ketchup
– 1/4 cup apple cider vinegar
– 1/4 cup brown sugar
– 1 tablespoon soy sauce
– 1 teaspoon fresh ginger, grated
– 1/4 teaspoon red pepper flakes (optional)
This blend gives you a tangy and sweet sauce. Whisk well and taste. You can adjust the sweetness by adding more sugar if needed.
Can I use chicken thighs instead of breasts?
Yes, you can use chicken thighs! Thighs are juicier and packed with flavor. Just cut them into bite-sized pieces like the breasts. They will still cook well in the frying step. The sauce will soak in nicely, giving you a tasty dish.
What can I serve with sweet and sour chicken?
Sweet and sour chicken pairs well with many sides. Here are some ideas:
– Fluffy steamed rice
– Fried rice with veggies
– Noodles tossed in soy sauce
– A fresh green salad
These sides balance the sweet and tangy flavors of the chicken.
How long does sweet and sour chicken last in the fridge?
Sweet and sour chicken stays good in the fridge for about 3 to 4 days. Store it in an airtight container to keep it fresh. If you want to save it longer, consider freezing it. Just make sure to thaw it safely before reheating.
You learned how to make delicious sweet and sour chicken. We covered the key ingredients, cooking steps, and helpful tips. Remember to adjust flavors for your taste. Try different proteins and veggies to mix it up. When you store leftovers, use the right methods to keep them fresh. Enjoy your cooking journey, and impress everyone with your new skills!