Do you want a tasty snack that’s easy to make and healthy too? This Peanut Butter Granola Bars recipe is just what you need! With simple ingredients like rolled oats, creamy peanut butter, and honey, you’ll whip up a batch in no time. These bars are perfect for breakfast, a snack, or even dessert. Let’s dive into this easy recipe and enjoy a nutritious treat you’ll love!
Why I Love This Recipe
- Nutritious and Filling: These granola bars are packed with wholesome ingredients, making them a perfect snack to keep you energized throughout the day.
- Customizable: You can easily adjust the ingredients based on your preferences, adding different nuts, seeds, or dried fruits to make it your own!
- Quick and Easy: With minimal preparation and cooking time, you can whip these up in no time, making them an ideal choice for busy schedules.
- Great for Meal Prep: These bars store well in an airtight container, making them a fantastic option for meal prepping snacks for the week ahead.
Ingredients
Essential Ingredients
– 2 cups rolled oats
– 1 cup creamy peanut butter
– 1/3 cup honey (or maple syrup)
– 1/2 cup chopped nuts
– 1/2 cup mini chocolate chips
– 1/4 cup chia seeds
– 1/4 teaspoon salt
– 1 teaspoon vanilla extract
To make my peanut butter granola bars, I use simple yet tasty ingredients. First, I grab rolled oats for a hearty base. They provide fiber and help keep you full. Next, I reach for creamy peanut butter. It gives the bars a rich flavor and adds protein.
Honey or maple syrup is next. Both sweeten the bars and help them stick together. I love adding chopped nuts, like almonds or walnuts, for a satisfying crunch. Mini chocolate chips add a touch of sweetness, making them fun to eat.
Chia seeds are a must. They boost the nutritional value and add a nice texture. A pinch of salt balances the sweetness. Lastly, I always add a splash of vanilla extract for extra flavor.
Optional Ingredients
– 1/2 cup dried fruits (raisins, cranberries, or apricots)
– Vegan alternatives
You can get creative with optional ingredients. Dried fruits like raisins or cranberries add natural sweetness and chewiness. If you want to make these bars vegan, use maple syrup instead of honey. You can also choose dairy-free chocolate chips. These swaps make the bars fun for everyone!

Step-by-Step Instructions
Preparation Steps
1. Preheat your oven to 350°F (175°C).
2. Line an 8×8 inch baking pan with parchment paper. Leave some paper hanging over the edges for easy removal.
3. In a large bowl, mix together:
– 2 cups rolled oats
– 1/2 cup chopped nuts
– 1/4 cup chia seeds
– 1/4 teaspoon salt
Combining Ingredients
1. In a small saucepan, warm:
– 1 cup creamy peanut butter
– 1/3 cup honey (or maple syrup)
Stir these on low heat until smooth.
2. After heating, remove from heat and add:
– 1 teaspoon vanilla extract
3. Pour this warm mixture into the bowl with dry ingredients.
4. Mix well until all ingredients are combined. If you want, fold in:
– 1/2 cup mini chocolate chips
– Optional: 1/2 cup dried fruits
Baking and Cooling
1. Transfer the mixture to the prepared pan.
2. Press it down evenly using a spatula.
3. Bake for 15-20 minutes until the edges turn golden brown.
4. Remove from the oven and let it cool for about 20 minutes in the pan.
5. Once cool, lift the granola out using the parchment paper.
6. Cut into bars or squares on a cutting board.
7. Let them cool completely before storing.
Tips & Tricks
Perfecting Your Granola Bars
– Choose the right peanut butter
I recommend using creamy peanut butter. It mixes well and gives a smooth texture. Natural peanut butter works too, but may change the taste. Check for no added sugar or oils. This helps keep your bars healthy.
– How to create a chewy or crunchy texture
Want chewy bars? Bake them for 15 minutes. For crunchier bars, bake a bit longer, around 20 minutes. Cooling them longer can also add to the crunch. Just remember, the more you bake, the crunchier they get!
Presentation Tips
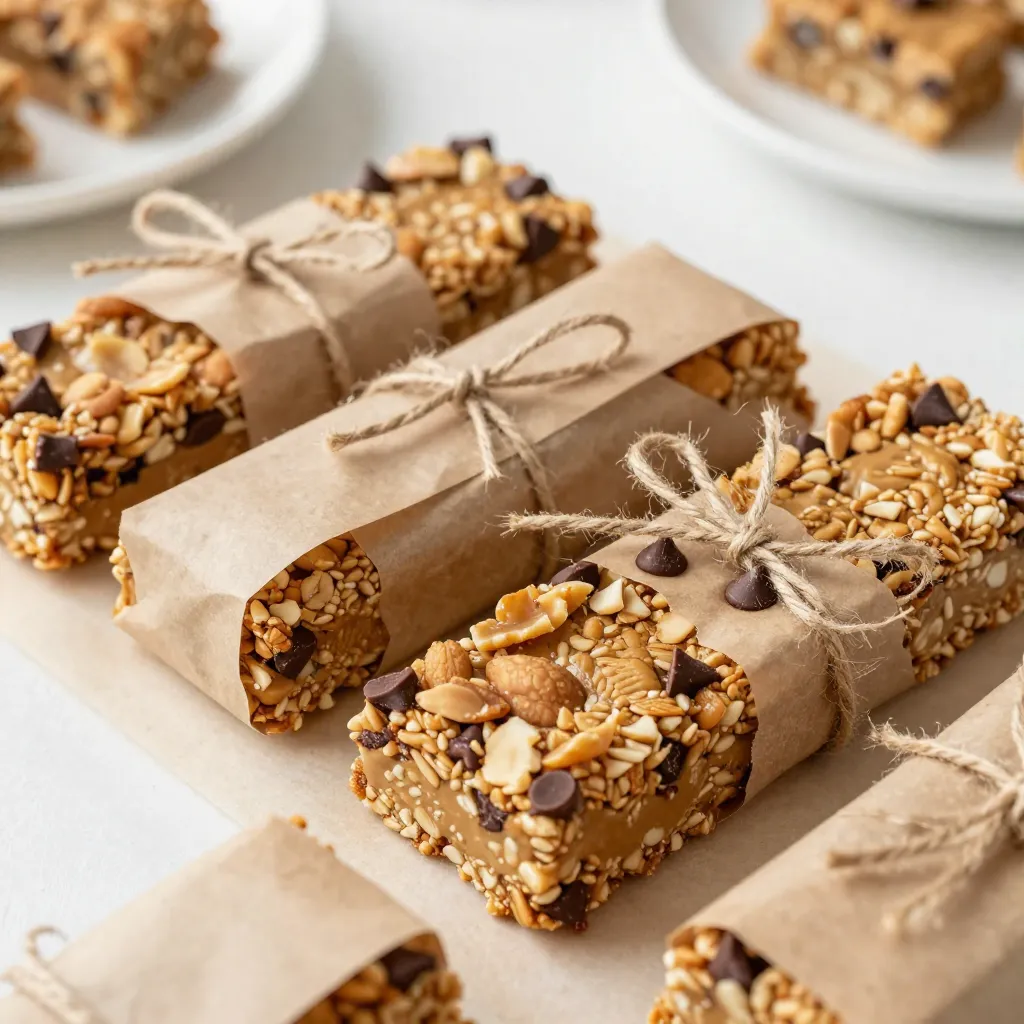
– Wrapping for gifts or on-the-go snacks
Wrap each bar in parchment paper. Tie it with twine for a cute touch. This makes them easy to grab for a snack or a great gift for friends.
– Flavor variations for added appeal
You can mix in dried fruits like cranberries or apricots for new flavors. Try adding spices like cinnamon or nutmeg for warmth. Use different nuts too, like almonds or walnuts, to keep things exciting!
Pro Tips
- Storage Solution: For maximum freshness, store your granola bars in an airtight container in the refrigerator. This will keep them firm and delicious for up to two weeks.
- Custom Flavoring: Feel free to experiment with different nut butters like almond or cashew for a unique flavor twist that keeps your snacks exciting!
- Nut Alternatives: If you have nut allergies, substitute the nuts with seeds like pumpkin or sunflower seeds for a similar crunch and added nutrients.
- Perfect Portioning: For uniform bars, use a ruler to mark your cuts before slicing, ensuring that each bar is the same size and easy to grab on the go.
Variations
Gluten-Free Options
You can make your granola bars gluten-free. Simply substitute the oats with certified gluten-free oats. For nuts, you can use any variety you like. Almonds and walnuts work great. You can also try seeds like pumpkin or sunflower for added crunch. This way, everyone can enjoy the bars!
Vegan Alternatives
To make these bars vegan, swap honey for maple syrup. Maple syrup adds a lovely sweetness. Use dairy-free chocolate chips instead of regular ones. This keeps your bars free from animal products. You still get that rich flavor and chewy texture.
Flavor Infusions
Spice up your granola bars with flavor. Add a dash of cinnamon or nutmeg for warmth. You can also mix in different nut butters. Almond or cashew butter can change the taste profile. Get creative! Each variation brings a new twist.
Storage Info
Best Storage Practices
To keep your peanut butter granola bars fresh, store them in an airtight container. This prevents them from becoming stale. I recommend using a glass or plastic container with a tight lid. If you want to keep them longer, you can freeze the bars. Wrap each bar in plastic wrap and place them in a freezer bag. This way, they can last up to three months.
Serving Suggestions
You can enjoy these granola bars in many ways. They make a great snack to fuel your day. You can also have them for breakfast with a side of fruit or yogurt. If you’re craving something sweet, pair them with a scoop of ice cream for a quick dessert. These bars are flexible enough to fit any meal or snack time.
FAQs
How long do homemade peanut butter granola bars last?
Homemade peanut butter granola bars can last about a week at room temperature. If you store them in an airtight container, they will stay fresh longer. You can also freeze them for up to three months. Just wrap each bar well to avoid freezer burn.
Can I substitute honey in this recipe?
Yes, you can substitute honey with maple syrup. Maple syrup makes the bars vegan-friendly. Agave syrup is another good option. Just use a similar amount, about one-third cup.
What is the nutritional information per bar?
Each bar has roughly 200 calories. It contains about 8 grams of protein, 10 grams of fat, and 24 grams of carbs. The exact values can change based on the nuts and chocolate you use. Always check the labels for precise data.
Are peanut butter granola bars healthy?
Peanut butter granola bars can be healthy. They provide good protein from peanut butter and fiber from oats. They also have healthy fats from nuts. Just watch the sugar content if you use chocolate or dried fruits.
Can I make these granola bars nut-free?
Yes, you can make nut-free granola bars. Replace peanut butter with sun butter or soy nut butter. You can also skip the nuts completely and add more seeds or dried fruits for texture.
You now know how to make great peanut butter granola bars. We went over essential and optional ingredients, steps to prepare, and tips to perfect your bars. You can choose flavors, textures, and storage methods that fit your needs. These bars make tasty snacks, breakfasts, or desserts. With simple changes, you can create a version that suits any diet. Try different flavors and share your new favorites! Happy bakin