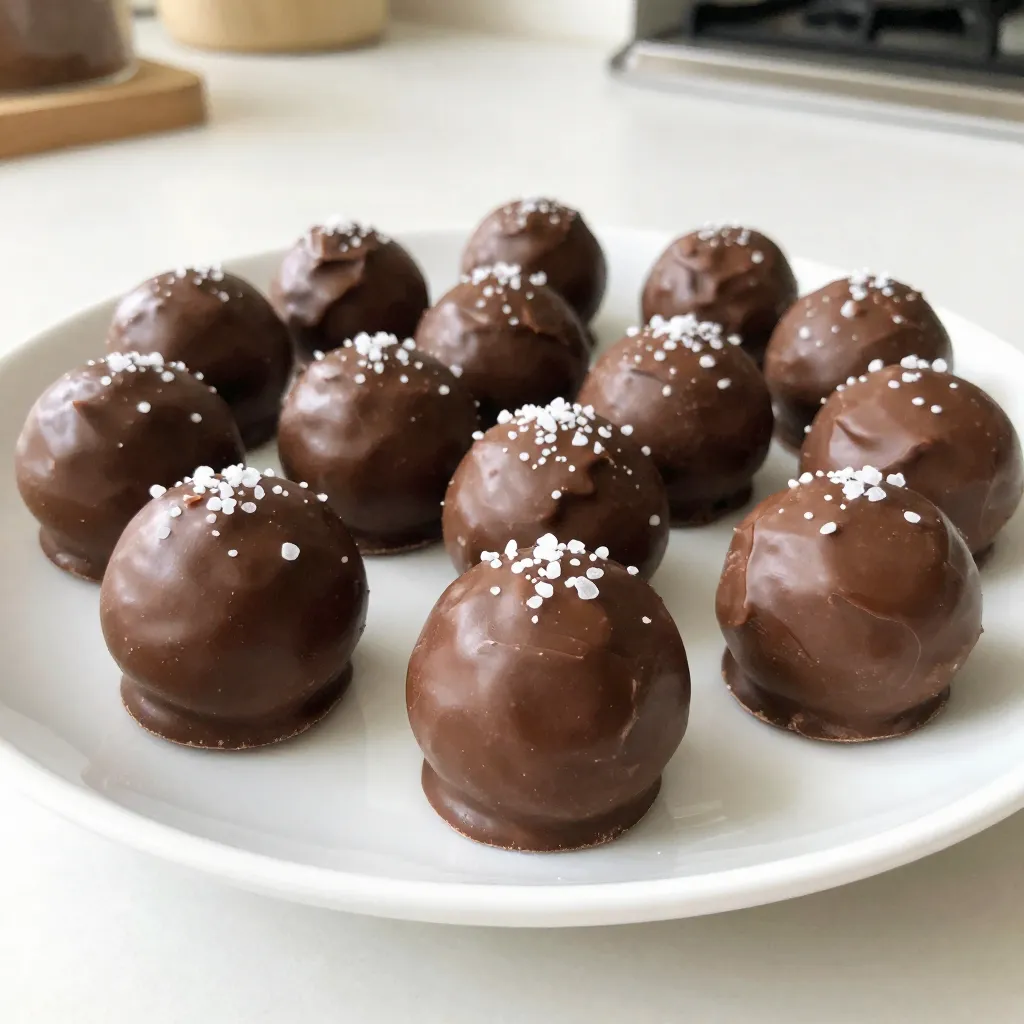
Looking for a fun and tasty treat this season? My easy recipe for Festive Butterfinger Balls is here to help! With just a few ingredients, you’ll create delicious bites that everyone will love. Whether you’re hosting a party or just craving something sweet, this recipe is sure to impress. Let’s dive in and whip up some joyful treats that will brighten your holiday gatherings!
Why I Love This Recipe
- Decadent Flavor Combination: The mix of rich chocolate, creamy peanut butter, and crunchy Butterfinger creates an irresistible taste experience that is both sweet and satisfying.
- Easy to Make: With just a few simple steps, you can whip up these delightful bites in no time, making them perfect for any occasion or last-minute gatherings.
- Perfect for Sharing: These bliss bites are great for parties and celebrations, ensuring your guests will enjoy a delicious treat that is sure to impress.
- Customizable Treat: Feel free to get creative with toppings or fillings, allowing you to tailor this recipe to your taste preferences and make it even more special.
Ingredients
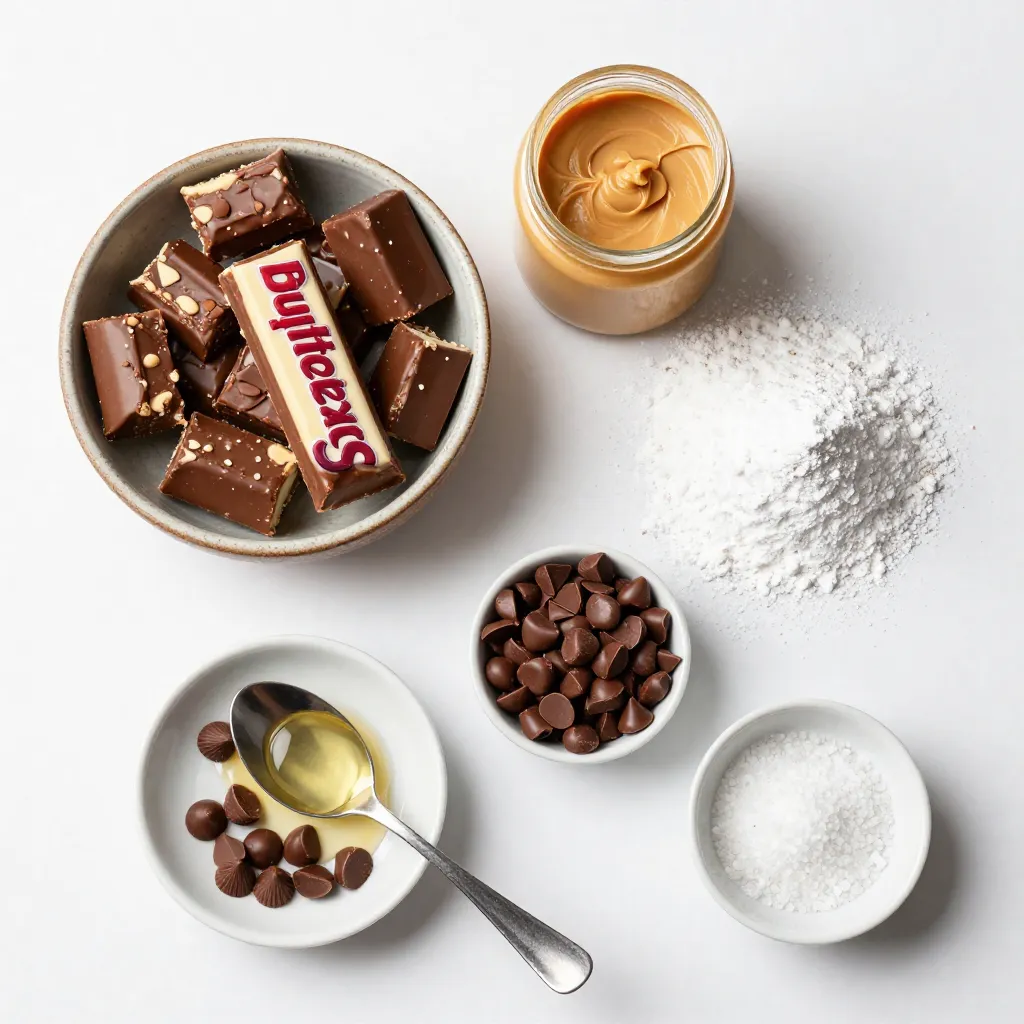
Main Ingredients List
– 1 cup Butterfinger candy bars, finely crushed
– 1 cup smooth, creamy peanut butter
– 1 cup powdered sugar
– 2 cups semi-sweet chocolate chips
– 1 tablespoon coconut oil (or vegetable oil)
– Sea salt, for a light sprinkle (optional)
These ingredients create the perfect blend of sweet and salty flavors. The Butterfinger bars bring a unique crunch, while the peanut butter adds creaminess. The powdered sugar helps bind everything together and gives a nice sweetness.
Optional Ingredients for Variations
– Add crushed nuts for extra crunch.
– Use milk chocolate chips instead of semi-sweet.
– Try white chocolate for a sweeter taste.
Feel free to mix and match. Experimenting with these options can create a fun twist on the classic recipe.
Suggested Equipment
– Large mixing bowl
– Spatula or your hands for mixing
– Baking sheet
– Parchment paper
– Microwave-safe bowl
– Fork for dipping
Having the right tools makes this process smooth and easy. Make sure to have everything ready before you start, so you can enjoy the fun.
Step-by-Step Instructions
Mixing the Base Ingredients
First, gather your ingredients. You will need 1 cup of finely crushed Butterfinger bars, 1 cup of creamy peanut butter, and 1 cup of powdered sugar. In a large mixing bowl, add the crushed Butterfinger bars and peanut butter. Mix them well with a spatula or your hands. It should become thick and sticky.
Shaping the Butterfinger Balls
Next, dampen your hands slightly. This helps the mixture not stick to your hands. Scoop out about 1 tablespoon of the mixture. Roll it into a ball shape. Place each ball on a baking sheet lined with parchment paper. Repeat until all the mixture is shaped into balls.
Coating with Chocolate
Now, it’s time to coat the balls. For the chocolate, melt 2 cups of semi-sweet chocolate chips with 1 tablespoon of coconut oil. Use a microwave-safe bowl. Heat it in 30-second bursts, stirring after each time. Once melted, dip each ball into the chocolate. Make sure it is fully covered. Use a fork to lift it out. Let any extra chocolate drip off before placing it back on the baking sheet. If you want, sprinkle a tiny pinch of sea salt on top while the chocolate is soft. This adds a nice touch. After coating all the balls, chill them in the fridge for 15-20 minutes. This helps the chocolate set. Enjoy your festive Butterfinger balls!
Tips & Tricks
Achieving the Perfect Texture
To make Butterfinger balls that are just right, follow these tips. First, crush the Butterfinger bars well. Small pieces blend better. Next, mix the peanut butter and powdered sugar slowly. This helps you find the right thickness. If the mix feels too sticky, add a bit more powdered sugar. If it’s too dry, add a little peanut butter. You want a dough that holds its shape but is not too hard.
How to Melt Chocolate Smoothly
Melting chocolate can be tricky. Start with high-quality chocolate chips. They melt evenly and taste great. Use a microwave-safe bowl for easy heating. Heat the chocolate in short bursts of 30 seconds. Stir well between each burst. This keeps the chocolate from burning. If you add coconut oil, it helps the chocolate stay smooth and shiny. Be patient, and your chocolate will melt perfectly.
Creating Festive Decorations
Making your Butterfinger balls look festive adds joy. Use colored sprinkles or edible glitter for a fun touch. You can also drizzle white chocolate over the top for contrast. Another idea is to use crushed nuts or candy pieces as toppings. While the chocolate is soft, add these decorations. It makes your treats pop and look great for any celebration!
Pro Tips
- Chill the Mixture: Before rolling into balls, chilling the mixture for about 15 minutes can make it easier to handle and shape.
- Use Quality Chocolate: Opt for high-quality chocolate chips for coating to enhance the flavor of your bliss bites.
- Experiment with Toppings: Consider adding crushed nuts or sprinkles on top of the chocolate before it sets for added texture and visual appeal.
- Storage Tips: Store any leftovers in an airtight container in the refrigerator to keep them fresh for longer.
Variations
Different Coatings and Toppings
You can change the outside of your Butterfinger balls for fun. Try using white chocolate instead of semi-sweet for a creamy touch. If you want a crunch, roll them in crushed nuts or sprinkles. You could even use crushed cookies for a unique look. For a festive touch, drizzle melted chocolate on top after coating. This adds a lovely design and extra flavor.
Dietary Modifications (Gluten-free, Vegan)
To make these bites gluten-free, just check the Butterfinger bars. Most are gluten-free, but always read the label. For vegan options, use a plant-based chocolate and peanut butter. You can also find vegan powdered sugar. These swaps keep the taste while meeting different diets. Everyone can enjoy these treats at your gathering!
Flavor Customizations
Want to mix things up? Add a splash of vanilla extract to the dough for a richer taste. You can also fold in mini chocolate chips or a hint of cinnamon. If you love coconut, add shredded coconut to the mixture. This gives your Butterfinger balls a tropical twist. Experiment with flavors to find your favorite!
Storage Info
Best Practices for Storing Butterfinger Balls
To keep your Butterfinger balls fresh, store them in an airtight container. This helps prevent moisture and keeps them tasty. Place a layer of parchment paper between the layers if you stack them. This stops them from sticking together. Store the container in a cool, dry place, away from sunlight.
Freezing for Later Use
You can freeze Butterfinger balls for later! After you coat them in chocolate and let them set, place them in a freezer-safe bag. Make sure to remove as much air as possible. They can last in the freezer for up to three months. When you are ready to eat them, take them out and let them thaw in the fridge.
Shelf Life and Serving Suggestions
These treats can last in the fridge for about a week. For the best taste, enjoy them fresh! Serve them at parties or gatherings for a sweet surprise. You can also give them as gifts in pretty boxes. Everyone loves a sweet treat!
FAQs
Can I substitute the peanut butter?
Yes, you can use almond butter or sunflower seed butter. These options work well. They give a similar creamy texture. However, the taste may change a bit. Almond butter adds a nutty flavor. Sunflower seed butter makes it nut-free.
What is the best way to soften chocolate?
To soften chocolate, use a microwave. Heat it in short bursts of 30 seconds. Stir after each burst until smooth. You can also use a double boiler. Just place a bowl over simmering water. This method helps avoid burning the chocolate.
How do I make these ahead of time?
You can make Butterfinger balls a day or two ahead. Simply follow the recipe steps. After coating in chocolate, store them in an airtight container. Keep the container in the fridge. They will stay fresh and tasty for your gathering.
You now have all the info to make delicious Butterfinger balls. We covered the main ingredients, how to mix and shape, and tips for perfect texture. You learned about fun variations to suit your needs. Plus, we talked about how to store and serve them well. With these steps, you can impress everyone with your treats. Enjoy your baking and get creative with each batc