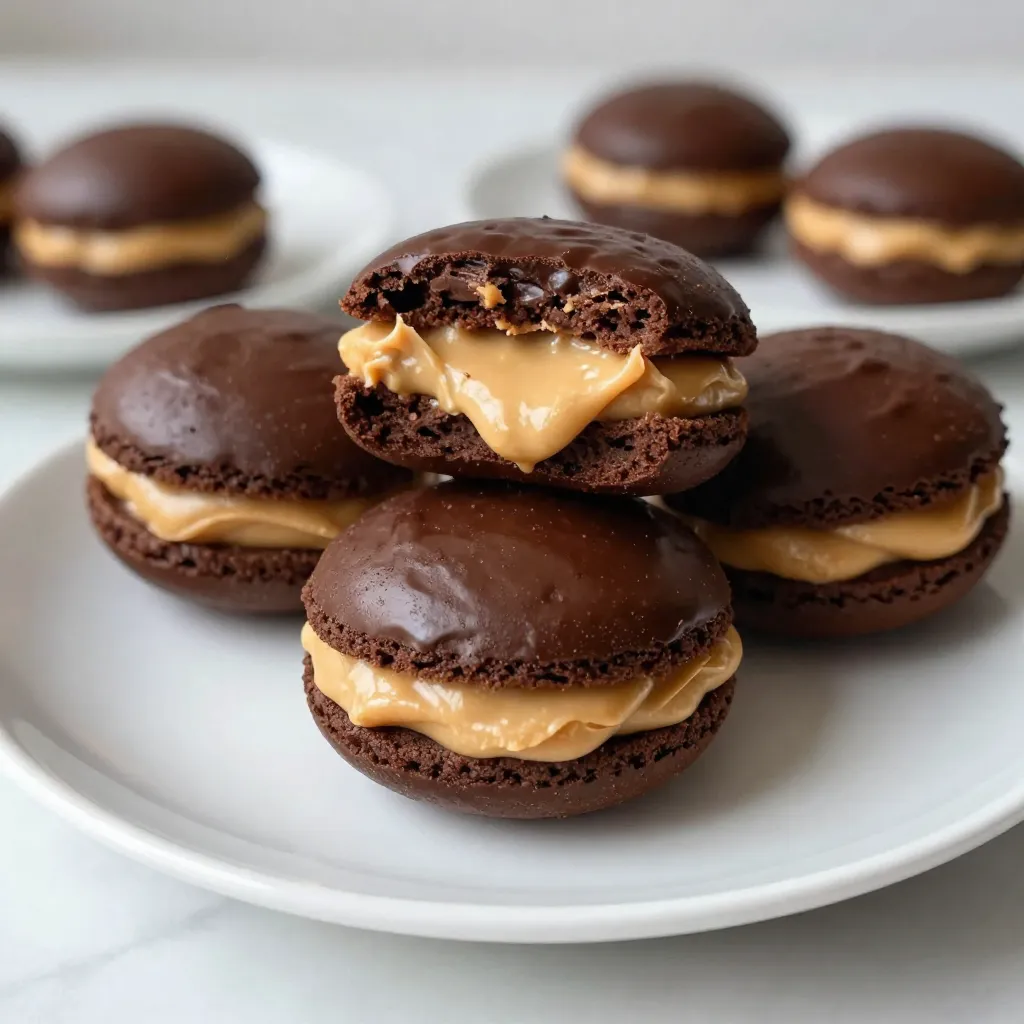
If you love chocolate and peanut butter, you’re in for a treat! These Chocolate Peanut Butter Whoopie Pies combine soft, fluffy cakes with a creamy peanut butter filling. They’re perfect for parties, snacks, or just because. I’ll guide you through simple steps to make these irresistible delights at home. Get ready to impress your friends and family with this easy, tasty recipe! Let’s dive in!
Why I Love This Recipe
- Indulgent Flavor Combination: The rich chocolate and creamy peanut butter filling create a perfect balance of flavors that is simply irresistible.
- Fun to Make: Assembling whoopie pies is a delightful activity, letting you get creative with the filling and presentation.
- Perfect for Any Occasion: These whoopie pies are great for parties, picnics, or just a sweet treat at home, making them versatile for any event.
- Easy to Customize: You can easily swap ingredients or add extras like chocolate chips or crushed nuts to make them your own!
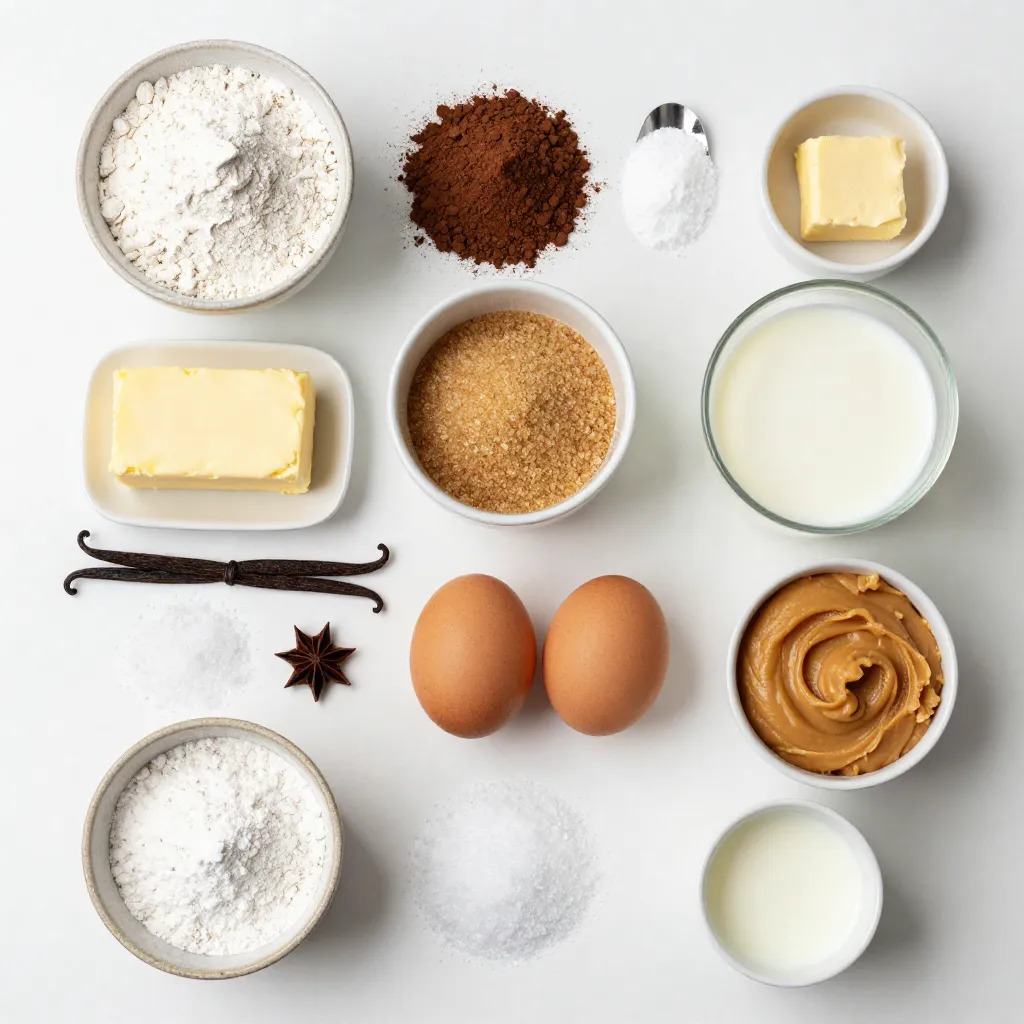
Ingredients
Main Ingredients for Whoopie Pies
– 1 cup all-purpose flour
– 1/2 cup unsweetened cocoa powder
– 1 teaspoon baking soda
– 1/4 teaspoon salt
– 1/2 cup unsalted butter, softened to room temperature
– 1 cup packed brown sugar
– 1/2 cup granulated sugar
– 1 large egg, at room temperature
– 1 teaspoon vanilla extract
– 1/2 cup buttermilk, at room temperature
For the whoopie pie batter, I start with all-purpose flour and unsweetened cocoa powder. The flour gives structure, while cocoa adds rich flavor. I also add baking soda and salt, which help the pies rise and balance the sweetness.
Next, I mix in unsalted butter, brown sugar, and granulated sugar. The butter gives moisture, and the sugars provide sweetness and a nice texture. The egg and vanilla extract add richness and flavor. Finally, buttermilk keeps the batter light and tender.
Peanut Butter Cream Filling Ingredients
– 1/2 cup creamy peanut butter
– 1/4 cup unsalted butter, softened to room temperature
– 1 cup powdered sugar
– 2 tablespoons milk
– A pinch of salt
For the creamy filling, I use a mix of creamy peanut butter and butter. This base creates a smooth and rich texture. I then add powdered sugar for sweetness and milk to achieve the right consistency. A pinch of salt enhances the flavor, making the filling irresistible.
These ingredients come together to create a delicious sandwich of chocolate and peanut butter. Each bite offers a perfect blend of flavors that keeps you coming back for more.
Step-by-Step Instructions
Preparing the Batter
1. Preheat the Oven: Set your oven to 350°F (175°C). Line two baking sheets with parchment paper. This helps prevent sticking.
2. Mix Dry Ingredients: In a medium bowl, whisk together:
– 1 cup all-purpose flour
– 1/2 cup unsweetened cocoa powder
– 1 teaspoon baking soda
– 1/4 teaspoon salt
Set this aside for later.
3. Cream Butter and Sugars: In a large bowl, combine:
– 1/2 cup unsalted butter, softened
– 1 cup packed brown sugar
– 1/2 cup granulated sugar
Use an electric mixer to beat this until light and fluffy. This should take about 3-4 minutes.
Combining Ingredients
4. Incorporate Egg and Vanilla: Add:
– 1 large egg
– 1 teaspoon vanilla extract
Mix well until everything is combined.
5. Combine Dry and Wet Ingredients: Gradually add the dry mix into the wet mix. Alternate with:
– 1/2 cup buttermilk.
Start and finish with the dry mix. Mix just until combined to keep a light texture.
6. Scoop Batter: Use a cookie scoop or tablespoon to drop heaping spoonfuls of the batter onto your prepared sheets. Leave space between each scoop.
Baking and Cooling
7. Bake: Place the sheets in the oven. Bake for 10-12 minutes. They are done when the tops spring back when pressed lightly. Let them cool on the baking sheet for about 5 minutes. Then, transfer them to a wire rack to cool completely.
Making the Filling and Assembling
8. Prepare the Filling: In a medium bowl, beat together:
– 1/2 cup creamy peanut butter
– 1/4 cup unsalted butter, softened
Mix until smooth. Gradually add:
– 1 cup powdered sugar
– 2 tablespoons milk
– A pinch of salt
Keep beating until the filling is creamy and fluffy.
9. Assemble Whoopie Pies: Once the cakes are cool, flip half of them upside down. Spread the peanut butter filling on each inverted cake. Top with another cake and press gently.
10. Serve: Enjoy your whoopie pies right away, or chill them for 30 minutes for a firmer filling.
Tips & Tricks
Perfecting the Whoopie Pies
To make the best whoopie pies, avoid overmixing the batter. Mixing too much can make them tough. When you combine the dry and wet ingredients, mix just until you see no flour. This keeps the whoopie pies soft and fluffy.
Using room temperature ingredients is key. When butter, eggs, and buttermilk are at room temp, they mix better. This helps create a smooth batter and a nice rise while baking.
Presentation Ideas
For a lovely touch, dust your whoopie pies with powdered sugar before serving. This simple step adds elegance and sweetness.
You can also get creative with how you serve them. Try stacking the whoopie pies on a decorative platter. You can add fresh berries or mint leaves around them for color. This makes your dessert look even more tempting!
Pro Tips
- Use Room Temperature Ingredients: Ensuring that your butter, egg, and buttermilk are at room temperature will help create a smooth batter and result in lighter, fluffier cakes.
- Don’t Overmix: When combining the wet and dry ingredients, mix just until incorporated. Overmixing can lead to dense whoopie pies.
- Chill the Filling: If you prefer a firmer filling, refrigerate the peanut butter cream for about 30 minutes before spreading it between the cakes.
- Presentation Matters: Dust the finished whoopie pies with powdered sugar before serving and arrange them on a colorful platter to enhance their visual appeal.
Variations
Different Flavor Fillings
You can make whoopie pies even more fun with different fillings. One tasty option is chocolate ganache. This rich filling is made by melting chocolate with cream. Just let it cool slightly before spreading it between the cakes. The dark chocolate pairs well with the sweet cake.
Another great choice is mint-flavored filling. You can mix a few drops of mint extract into the peanut butter filling. This gives the whoopie pies a fresh twist that many people love. It’s like a minty surprise in each bite!
Dietary Adjustments
If you want to make these whoopie pies gluten-free, you can swap the all-purpose flour. Use a gluten-free flour blend instead. Make sure it has a good binding agent, like xanthan gum.
For a vegan version, replace the egg with a flax egg. To make a flax egg, mix one tablespoon of ground flaxseed with three tablespoons of water. Let it sit for five minutes to thicken. Use a plant-based butter for the filling, and you’ll have a tasty vegan treat!
With these variations and adjustments, everyone can enjoy chocolate peanut butter whoopie pies. Try them out and share your favorites!
Storage Info
How to Store Whoopie Pies
To keep your whoopie pies fresh, store them in an airtight container. This helps prevent them from drying out. You can keep them in the fridge if you want extra firmness for the filling. If you prefer, you can also store them on the countertop. Just make sure they are covered to keep them fresh.
Freezing Instructions
You can freeze whoopie pies if you want to save some for later. If you freeze unfilled cookies, they stay fresh for up to three months. Just wrap them tightly in plastic wrap and place them in a freezer bag. For filled cookies, it’s best to freeze them without the filling. This way, the filling remains creamy and delicious. Once you thaw the cookies, you can add the filling right before serving.
FAQs
Common Questions About Whoopie Pies
How do you keep whoopie pies from drying out?
To keep whoopie pies soft, store them in an airtight container. You can also add a slice of bread to the container. The bread helps keep moisture in.
Can you make whoopie pies ahead of time?
Yes, you can prepare the cakes and filling a day ahead. Just store the cakes and filling separately. Combine them right before serving to keep them fresh.
What’s the difference between whoopie pies and cookies?
Whoopie pies are softer and cake-like. They have a creamy filling between two chocolate cakes. Cookies are often crispier and do not have a filling.
How long do whoopie pies last in the fridge?
Whoopie pies can last up to a week in the fridge. Keep them in an airtight container to maintain freshness.
Whoopie pies are fun and tasty treats made with simple ingredients. We covered how to make the batter, bake, and prepare a creamy peanut butter filling. I shared tips to help you achieve the best results. Remember, you can try different flavors and make dietary swaps too. Proper storage keeps your pies fresh for longer. Enjoy this delightful dessert with friends or family. Making whoopie pies is easy and rewarding, so get bakin