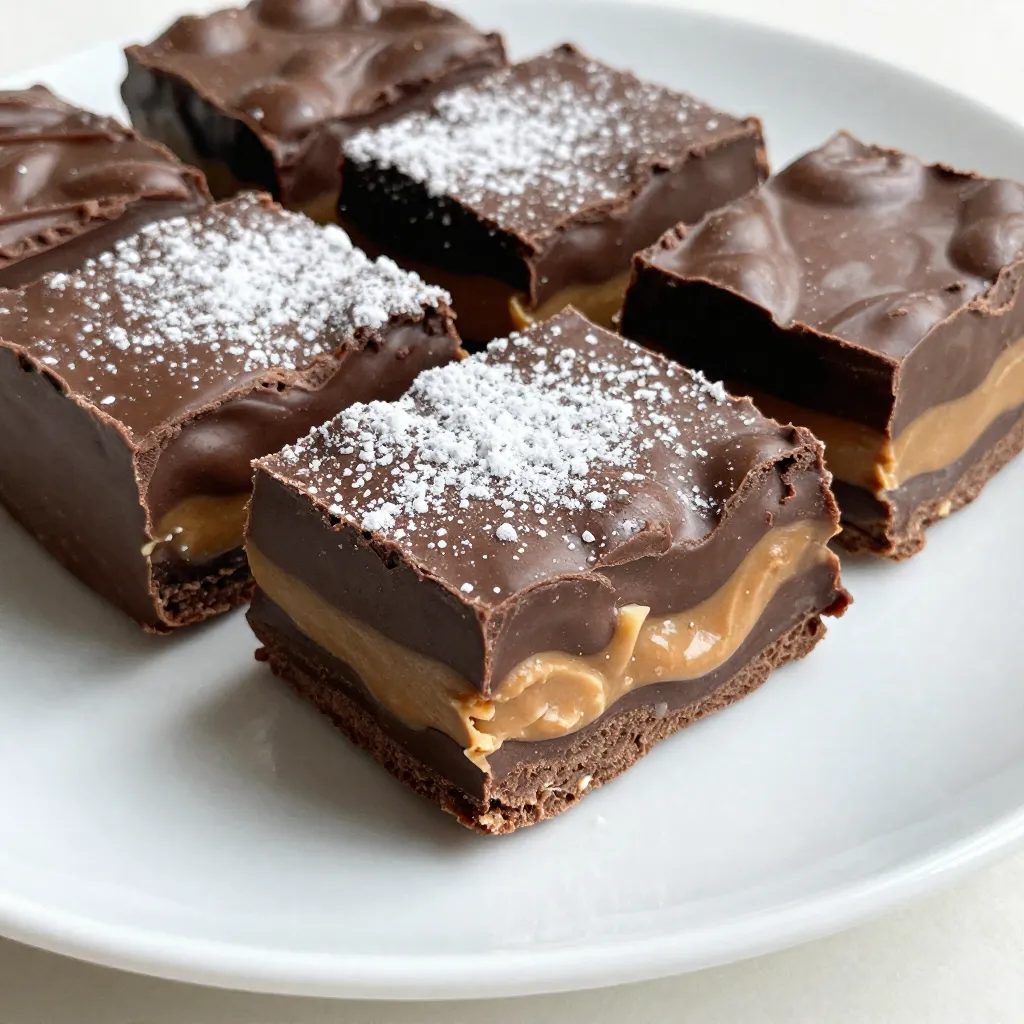
Craving a sweet treat that combines rich chocolate and creamy peanut butter? You’re in the right place! This Chocolate Peanut Butter Fudge recipe is simple and delicious. With smooth layers and a perfect texture, it’s hard to resist. Whether you’re a baking newbie or a seasoned pro, I’ll guide you through every step. Get ready to whip up this crowd-pleaser that will have everyone coming back for more!
Why I Love This Recipe
- Decadent Flavor Combination: The rich chocolate and creamy peanut butter create a mouthwatering treat that is simply irresistible.
- Easy to Prepare: With just a few simple ingredients and quick steps, this fudge comes together effortlessly, making it a perfect recipe for any occasion.
- Perfect for Sharing: This recipe yields 16 pieces, making it ideal for parties, gatherings, or just to enjoy with friends and family.
- Customizable Delight: Feel free to add nuts, sprinkles, or even a sprinkle of sea salt on top to personalize this fudge to your taste.
Ingredients
Essential Ingredients
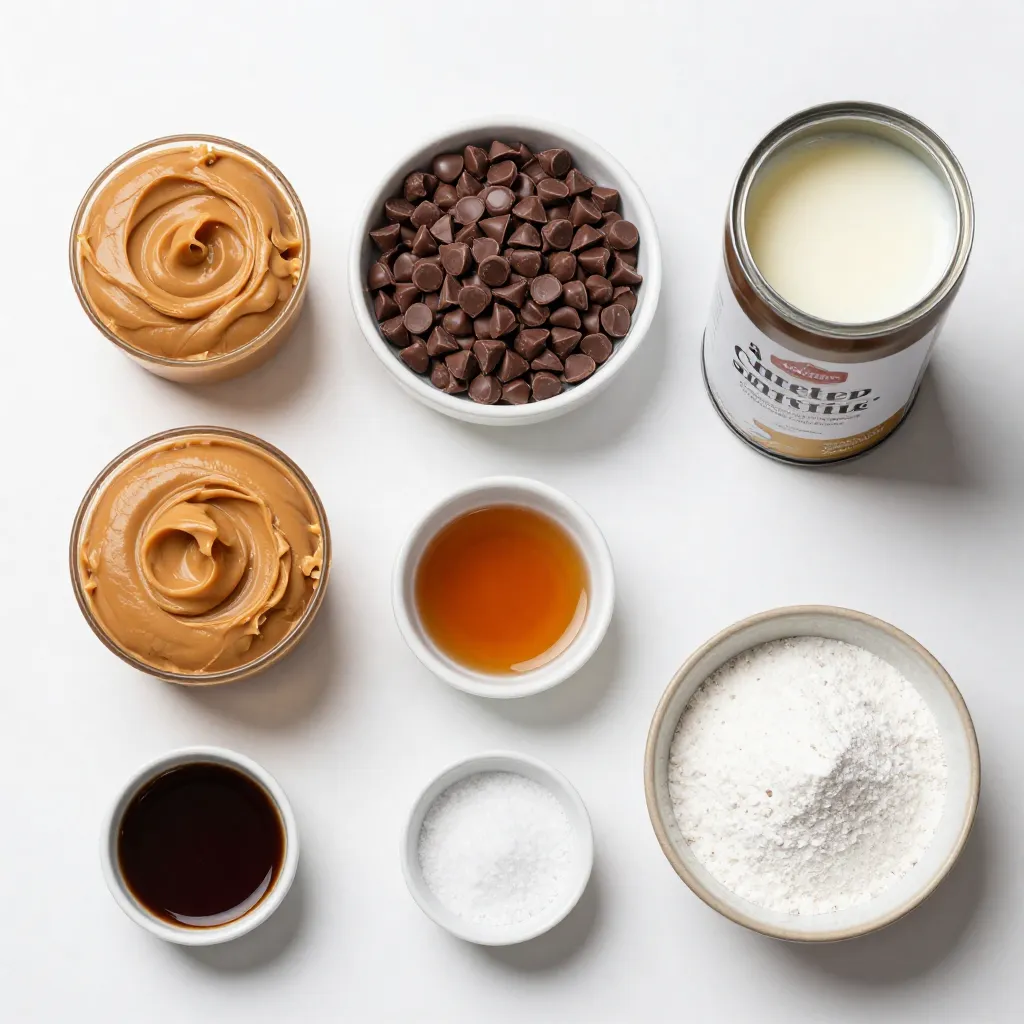
To make the best chocolate peanut butter fudge, you need:
– 1 cup creamy peanut butter
– 1 cup semi-sweet chocolate chips
– 1/2 cup sweetened condensed milk
– 1 teaspoon vanilla extract
– 1/4 cup powdered sugar
– A pinch of salt
These ingredients blend together to create a rich and creamy fudge. The creamy peanut butter gives a smooth texture, while the chocolate chips add sweetness. The sweetened condensed milk helps bind everything together for that melt-in-your-mouth feel.
Optional Ingredients
You might want to add some extra flavors or textures to your fudge. Consider these:
– Chopped nuts (like walnuts or pecans)
– A sprinkle of sea salt on top
– A splash of coffee for depth
These additions can elevate your fudge. Nuts add crunch, while sea salt enhances the sweet flavor. A hint of coffee can bring out the chocolate taste even more.
Ingredient Substitutions
If you are missing something, don’t worry. Here are some swaps you can try:
– Use crunchy peanut butter for a different texture.
– Swap semi-sweet chocolate chips for dark chocolate or milk chocolate.
– Replace sweetened condensed milk with coconut milk or almond milk for a lighter version.
These changes can help you use what you have at home. Each swap will give a unique twist to your fudge, so feel free to experiment!
Step-by-Step Instructions
Preparation of Baking Dish
First, grab an 8×8-inch baking dish. Line it with parchment paper. Make sure the paper hangs over the sides. This makes it easy to lift out the fudge later.
Melting Chocolate Mixture
Next, take a medium saucepan. On low heat, add the chocolate chips and sweetened condensed milk. Stir it often. Keep stirring until the chocolate melts into a smooth mix. Remove it from the heat. Then, add the vanilla extract and a pinch of salt. Mix until well combined.
Combining Peanut Butter Mixture
In a separate bowl, take the creamy peanut butter. Add the powdered sugar to it. Blend these two together. You want a smooth mix with no lumps.
Layering and Swirling
Now, pour half of the chocolate mixture into your lined dish. Spread it evenly with a spatula. Then, add spoonfuls of the peanut butter mix on top. Use a knife or skewer to swirl the layers gently. Be careful not to mix too much; you want to see both colors.
Chilling Fudge
Finally, pour the rest of the chocolate mix over the top. Smooth it out with the spatula. Place the dish in the fridge. Let it chill for at least 2 hours. This will help the fudge set. When it’s firm, lift it out using the parchment paper. Cut into small squares for serving. Enjoy!
Tips & Tricks
Perfecting the Texture
To make the best chocolate peanut butter fudge, focus on the texture. Use creamy peanut butter for a smooth finish. Melt the chocolate slowly to avoid burning it. Stir gently until it is silky and smooth. This gives your fudge a nice, rich feel.
How to Avoid Overmixing
Swirling the layers is key, but don’t overmix. When you add the peanut butter mixture, gently swirl with a knife. Too much mixing makes the fudge look dull. You want those beautiful layers to show. Less is more when it comes to mixing!
Presentation Suggestions
A good presentation makes your fudge even more tempting. Cut the fudge into small squares for serving. Place them on a decorative plate. For a fun touch, sprinkle some powdered sugar on top. A drizzle of melted chocolate can also add style. These simple ideas make your fudge look gourmet!
Pro Tips
- Chill the Ingredients: For a smoother fudge texture, consider chilling your peanut butter and even the chocolate chips before starting. This can help them melt more evenly.
- Use Quality Chocolate: The flavor of your fudge largely depends on the chocolate you use. Opt for high-quality semi-sweet chocolate chips for the best results.
- Perfect Swirls: When creating the marbled design, use a gentle hand with the knife or skewer. Overmixing can lead to a uniform color rather than a beautiful swirl.
- Storage Tips: Store the fudge in an airtight container in the refrigerator to keep it fresh for longer. It can last up to two weeks if stored properly!
Variations
Adding Nuts or Other Mix-Ins
You can make your fudge even better by adding nuts. Chopped peanuts work great. They add a nice crunch and extra flavor. Walnuts or pecans can also be tasty. Try adding mini chocolate chips for more chocolatey goodness. Mix-ins add fun textures and flavors to the fudge.
Using Different Types of Chocolate
While semi-sweet chocolate is classic, you can experiment with other types. Dark chocolate adds a rich taste. Milk chocolate makes the fudge sweeter and creamier. You might even try white chocolate for a different twist. Each type brings its own flavor, so feel free to mix and match!
Flavor Infusions
Add unique flavors to your fudge for a special touch. A dash of sea salt can enhance the sweetness. Try a splash of almond or hazelnut extract for a bold flavor. You can even mix in coffee or espresso powder for a mocha fudge. These small changes create big flavor differences!
Storage Info
Best Storage Practices
To keep your fudge fresh and tasty, store it in an airtight container. Make sure the fudge is completely cool before sealing. You can place parchment paper between layers of fudge to prevent sticking. This helps keep the fudge nice and smooth.
How Long It Lasts
When stored properly, your chocolate peanut butter fudge will last up to two weeks at room temperature. If you keep it in the fridge, it can last for up to a month. Always check for any signs of spoilage before eating.
Freezing Instructions
To freeze your fudge, cut it into squares. Wrap each piece tightly in plastic wrap. Then, place them in a freezer-safe bag or container. This way, you can enjoy this treat later. Frozen fudge can last for up to three months. When you’re ready to eat it, just thaw it in the fridge overnight.
FAQs
Can I use crunchy peanut butter instead?
Yes, you can use crunchy peanut butter if you like texture. Just swap it for creamy peanut butter in the recipe. The fudge will have a nice crunch, making it even more fun to eat!
How do I fix fudge that didn’t set?
If your fudge didn’t set, don’t worry! You can fix it. Cut the fudge into pieces, then melt it down in a pot. Add a bit more sweetened condensed milk. Stir well and pour it back into the dish. Chill again until it sets.
Can I make this recipe vegan?
Yes, you can make this fudge vegan! Use vegan chocolate chips and a plant-based sweetened condensed milk. Check the labels to ensure they are dairy-free. You can still enjoy this treat without any animal products!
What is the best way to cut fudge?
To cut fudge easily, use a sharp knife. First, warm the knife in hot water. Wipe it dry before cutting. This helps create clean edges. You can also dust the knife with powdered sugar to prevent sticking.
How do I melt chocolate without burning it?
Melt chocolate slowly to avoid burning it. Use low heat and stir often. You can also use a double boiler. Place a bowl over a pot of simmering water. This method allows even heat and keeps the chocolate smooth.
This blog post covered all you need to make great fudge. You learned about essential and optional ingredients, plus helpful substitutions. Step-by-step instructions guide you from prep to chilling. I shared tips on texture, mixing, and presentation. Variations let you experiment with flavors and mix-ins. Then, I provided storage tips and answered common questions.
In the end, making fudge is fun and easy. Dive in and enjoy creating your own unique treat