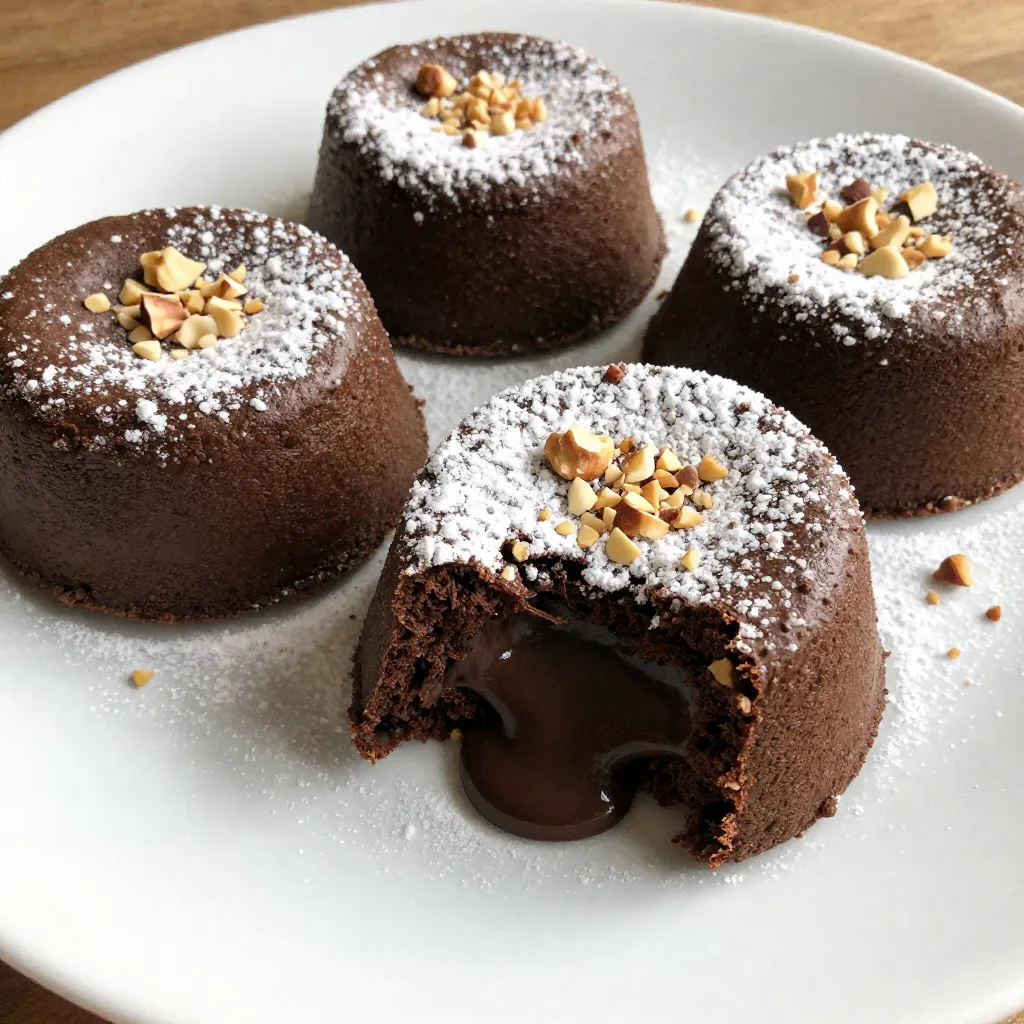
Are you craving a dessert that will wow your family and friends? Look no further than my Chocolate Hazelnut Lava Cakes! With rich chocolate, gooey centers, and a hint of hazelnut, this treat checks all the boxes for indulgence. I’ll guide you through each step, from gathering simple ingredients to mastering the perfect bake. Get ready to please your taste buds with an irresistible dessert you won’t forget!
Why I Love This Recipe
- Decadent Flavor: This recipe combines rich chocolate with the nutty flavor of hazelnuts, creating a truly indulgent dessert experience.
- Impressive Presentation: The molten center creates a stunning visual effect when served, making it perfect for special occasions.
- Quick and Easy: With a prep time of just 15 minutes, you can whip up these delicious cakes in no time, perfect for last-minute gatherings.
- Versatile Serving: These lava cakes can be paired with ice cream or whipped cream, allowing for endless variations to suit your taste.
Ingredients
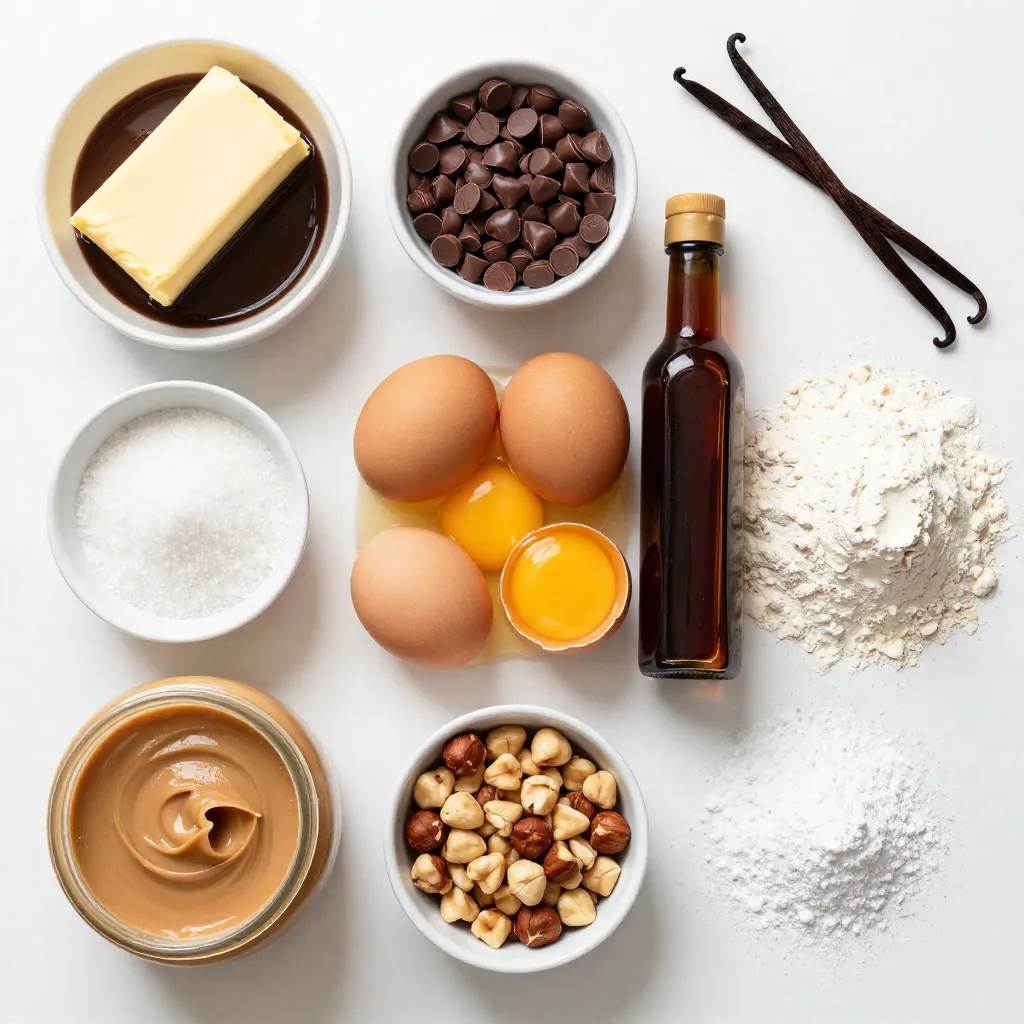
List of Ingredients
– 1/2 cup unsalted butter
– 1 cup bittersweet chocolate chips
– 1/2 cup granulated sugar
– 2 large eggs
– 2 large egg yolks
– 1 teaspoon vanilla extract
– 1/4 cup all-purpose flour
– 1/4 teaspoon salt
– 1/4 cup hazelnut spread (such as Nutella)
– 1/4 cup finely chopped hazelnuts (for garnish)
– Powdered sugar (for dusting)
Measurement Tips
– Use measuring cups and spoons for accuracy. This helps your cakes rise well.
– If you need to change measurements, remember that 1 cup equals 16 tablespoons.
– I recommend using Ghirardelli chocolate chips and Nutella for the best flavor.
Step-by-Step Instructions
Preparation
1. Preheat your oven to 425°F (220°C). This heat helps create that lovely gooey center.
2. Prepare four 6-ounce ramekins. Grease them with unsalted butter. This step is key for easy removal.
3. Dust each ramekin with flour. Tap out any extra flour to avoid clumping.
Melting Chocolate and Butter Mixture
1. In a microwave-safe bowl, add the unsalted butter and bittersweet chocolate chips.
2. Heat this mixture in the microwave. Do this in 30-second bursts, stirring well in between.
3. Once melted and smooth, let it cool for a few minutes. This cooling helps with mixing later.
Mixing Batter
1. Slowly whisk in the granulated sugar. Mix until it blends well and looks smooth.
2. Add the eggs and egg yolks one at a time. Whisk well after each addition. This step helps to incorporate air for fluffiness.
3. Stir in the vanilla extract. This adds a nice flavor to the cake.
4. Gently sift in the all-purpose flour and salt. Fold it in carefully to avoid overmixing.
Baking Process
1. Evenly distribute the batter into the prepared ramekins. Fill each about 3/4 full.
2. Take a heaping teaspoon of hazelnut spread. Place it in the center of each ramekin.
3. Lightly press the hazelnut spread down into the batter. This creates that delicious lava center.
4. Bake the cakes for about 12-14 minutes. Look for firm edges and a soft center.
5. Remove the ramekins from the oven and let them rest for 1 minute. This helps set the cake.
6. Run a knife around the edges of each ramekin. This step ensures easy release.
7. Invert each ramekin onto a dessert plate. Tap gently to help the cake come out.
8. Dust the warm lava cakes with powdered sugar. Top with finely chopped hazelnuts for extra crunch.
Enjoy your warm and gooey chocolate hazelnut lava cakes!
Tips & Tricks
Helpful Baking Tips
To get that perfect lava effect, timing is key. Bake your cakes for 12-14 minutes. The edges should look set, but the center must be soft and jiggly. If you overbake, you lose the gooey center.
To avoid overmixing, mix just until combined. When you add flour, fold it in gently. You want some air in the batter. This helps the cakes rise beautifully.
Serving Suggestions
Serve lava cakes warm for the best experience. Dust them with powdered sugar right before serving. A sprinkle of chopped hazelnuts adds a nice crunch. For extra flavor, add a scoop of vanilla ice cream on the side. This cool treat pairs well with the warm chocolate.
Common Mistakes
To get perfect results, avoid opening the oven too soon. This lets heat escape. If your cakes do not rise, check your baking powder or flour freshness.
For texture issues, like a dry cake, you may have baked too long. If your cakes stick to the ramekins, make sure to grease and flour them well.
Pro Tips
- Chill Your Ramekins: Before baking, chill your greased and floured ramekins in the fridge for about 10 minutes. This helps create a better crust on the outside and keeps the center gooey.
- Use Quality Chocolate: For the best flavor, opt for high-quality bittersweet chocolate. The taste of the chocolate significantly affects the overall flavor of the lava cake.
- Don’t Overbake: Keep a close eye on the baking time. The cakes should have firm edges but a soft, jiggly center. Overbaking can result in a cake that lacks the signature lava effect.
- Experiment with Flavors: Get creative by adding a splash of espresso or orange zest to the batter for an exciting twist on the classic chocolate hazelnut flavor.
Variations
Flavor Variations
You can change the flavor of your lava cakes easily. Try using dark chocolate or milk chocolate instead of bittersweet. Each type brings a different taste. You can also add flavored liqueurs or extracts. For example, hazelnut liqueur enhances the hazelnut flavor. Orange extract can add a bright twist, too. Experimenting with flavors makes the dessert uniquely yours.
Dietary Modifications
If you need gluten-free options, use almond flour instead of all-purpose flour. This swap keeps the cake moist and tasty. For vegan lava cakes, use flax eggs instead of regular eggs. Combine one tablespoon of ground flaxseed with three tablespoons of water. Let it sit for five minutes to thicken. Use a plant-based butter and a dairy-free chocolate to keep it vegan-friendly.
Additional Toppings
Get creative with toppings! Fresh fruit like raspberries or strawberries adds color and flavor. You could drizzle chocolate sauce or caramel sauce on top. A scoop of vanilla ice cream pairs well with the warm cake. For a layered dessert, add whipped cream between layers. This makes the dessert look fancy and delicious. Enjoy your personalized chocolate hazelnut lava cake!
Storage Info
Storing Leftovers
To store your leftover chocolate hazelnut lava cakes, follow these simple steps. First, let the cakes cool completely. Then, wrap each ramekin tightly with plastic wrap. This keeps them fresh in the fridge for up to three days. You can also freeze them for up to a month. To freeze, place the wrapped ramekins in a freezer-safe bag. When you want to enjoy them, remove the wrap and thaw in the fridge overnight.
When it’s time to reheat, place the ramekin in the oven at 350°F (175°C) for about 10-12 minutes. This helps keep the gooey center perfect. If you prefer the microwave, heat for 30 seconds, but watch closely. You want to warm them, not cook them more.
Shelf Life
You can store chocolate lava cakes in the fridge for about three days. If frozen, they last up to one month. Over time, the texture may change. Signs of spoilage include an off smell or a dry texture. If you see any mold, it’s best to toss them out.
Meal Prep Tips
Preparing chocolate lava cakes ahead of time is easy. You can make the batter a day before and keep it in the fridge. Just fill the ramekins and chill them. When you’re ready to bake, pull them out and bake as directed.
For freezing, fill the ramekins as usual. Cover them well and freeze. When ready to bake, no need to thaw. Just add a couple of extra minutes to the baking time. This way, you can enjoy this treat anytime!
FAQs
What is a lava cake?
A lava cake is a rich chocolate dessert. It has a warm, gooey center. When you cut into it, the melted chocolate flows out like lava. This cake is often served warm and is a favorite for chocolate lovers. It usually has a soft outer layer and a molten filling.
How can I make lava cake without ramekins?
If you don’t have ramekins, you can use muffin tins instead. Just grease the muffin tin well and dust it with flour. Fill each cup with batter and follow the same baking steps. You can also use oven-safe mugs or small bowls. Just remember to adjust baking time as needed.
Can I use milk chocolate instead of bittersweet?
Yes, you can use milk chocolate. It will make the cake sweeter and less intense. However, the texture may change slightly. Milk chocolate may not melt as smoothly, so keep an eye on it while melting. You might want to reduce the sugar in the recipe to balance the sweetness.
Why did my lava cakes not ooze?
There are a few reasons this might happen. If you bake the cakes too long, the center will set. Make sure to check them at the 12-minute mark. If you overmix the batter, it can lose air and become dense. Lastly, if you don’t place enough hazelnut spread in the center, it may not flow out.
We covered how to make delicious chocolate lava cakes with simple, clear steps. You learned about key ingredients, measurement tips, and baking methods. Remember to watch for signs of doneness to achieve that gooey center. Don’t hesitate to experiment with flavors or toppings to make it your own. Store leftovers carefully to enjoy later. With these tips, you can create a treat that impresses everyone. Enjoy baking and savoring your sweet successe
<!-- /wp:post-conte